 DAC - On
this occasion I will share the tutorial on How to Flash Vivo V9 Via
Qfill easily Tested 100% Work, Firmware Free No Password. maybe one of the visitors to this blog is looking for information on how to flash the Vivo V9 smartphone. You can follow the complete guide on how to flash the Vivo V9 below.
DAC - On
this occasion I will share the tutorial on How to Flash Vivo V9 Via
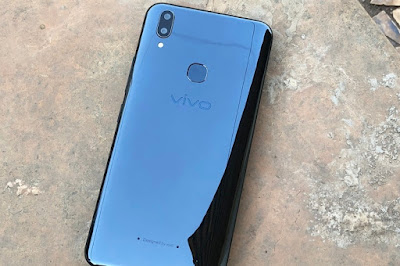
Qfill easily Tested 100% Work, Firmware Free No Password. maybe one of the visitors to this blog is looking for information on how to flash the Vivo V9 smartphone. You can follow the complete guide on how to flash the Vivo V9 below.Vivo V9 is one of the newest smartphones made by Vivo vendor. Vivo V9 comes with a pretty elegant design, and also has a fairly clear camera.
Before flashing the Vivo V9, we want to talk a little about what is flashing, flashing on a smartphone is the process of installing a smartphone unit using firmware and how many other materials. The usefulness of flashing is to repair and also update software that has been damaged such as:
After completing flashing the Vivo V9 smartphone will return to normal as when first buying from the Vivo smartphone shop.
Also Read : How to remove FRP and Lock Screen ViVo V9 / V9 Youth 2018 Pattern Using RBsof
After you understand or understand about a brief explanation about flashing, we just prepare the ingredients for flashing. Vivo V9 that uses Quallcomm chipset so that stock ROM is easy to find. and the manufacturer's original default firmware. in the form of files that will later be loaded through flash media output from INC. the process will be explained in the steps below.
Before proceeding to the flashing stage it would be good to first backup the data that you think is important in your Vivo V9 smartphone's internal memory. Because after finishing flashing the Vivo V9's internal memory will be empty as it first bought from a smartphone store.
Materials do flashing Vivo V9
- Download Qfill <<=== Press Here
- Download the Vivo V9 firmware <<=== Press Here
- Download USB driver <<=== Press Here
- PC or laptop
- USB cable (I recommend using a Vivo V9 smartphone USB cable)
- Install the USB driver to your PC or laptop (you can skip this step if the smartphone is detected by your computer)
- Extract the firmware that matches your smartphone type (put one folder, so it will be nice to find it later)
- Download Qfill / QPST.WIN.2.7 Installer-00429 to complete (follow the instructions suggested)
- And you open Qfill by> Start> All programs> Qfill> Open. as in the following picture.
- Click "Flat Build"
- Click "Browse .." Look for a file called "prog_emmc_firehose_8909.mbn" in the firmware output folder,
- Click "Load xml" then click the "rawprogram_unsparse" file and click the "patch0" file again.
- Turn off the smartphone that is still alive, until it's completely Of.
- Connect your smartphone to your PC / Laptop, simultaneously you press the "Volume UP> Volume Down" button until the "Download" button is opened then click. As in the following image.
- Wait until the flasing process takes place which is marked with a blue bar running slowly.
- If the flashing process is complete, the smartpharone will restore itself, and marked with "Download succeed". example as follows.
- Unplug your smartphone from your PC / Laptop and can immediately turn it on by pressing the power button for 5-10 seconds,
- Usually the first boot Vivo V9 smartphone takes 6-10 seconds.
- Finished .....
From this step, your smartphone has successfully put in a reinstall or Flashing. if
there is less understanding about How to Flash Vivo V9 Via Qfill easily
Tested 100% Work, Firmware Free No Password you can leave scribbles in
the comments column below. see you in the following article.

